Ever wondered what would be an effective way to find vulnerabilities within your organisational systems with ease﹖ Well in this section I will be covering vulnerability scanners for overall systems and websites which provide amazing reports within minutes!
Welcome to the fourth part of the my walkthrough of ‘The Ultimate Kali Linux Book’ by Glen D. Singh. Ever wondered what kind of tools professional penetration testers use to discover vulnerabilities? What to do once you have scanned for technology version? Where to find critical security issues in systems? Well all that will be answered in this section.
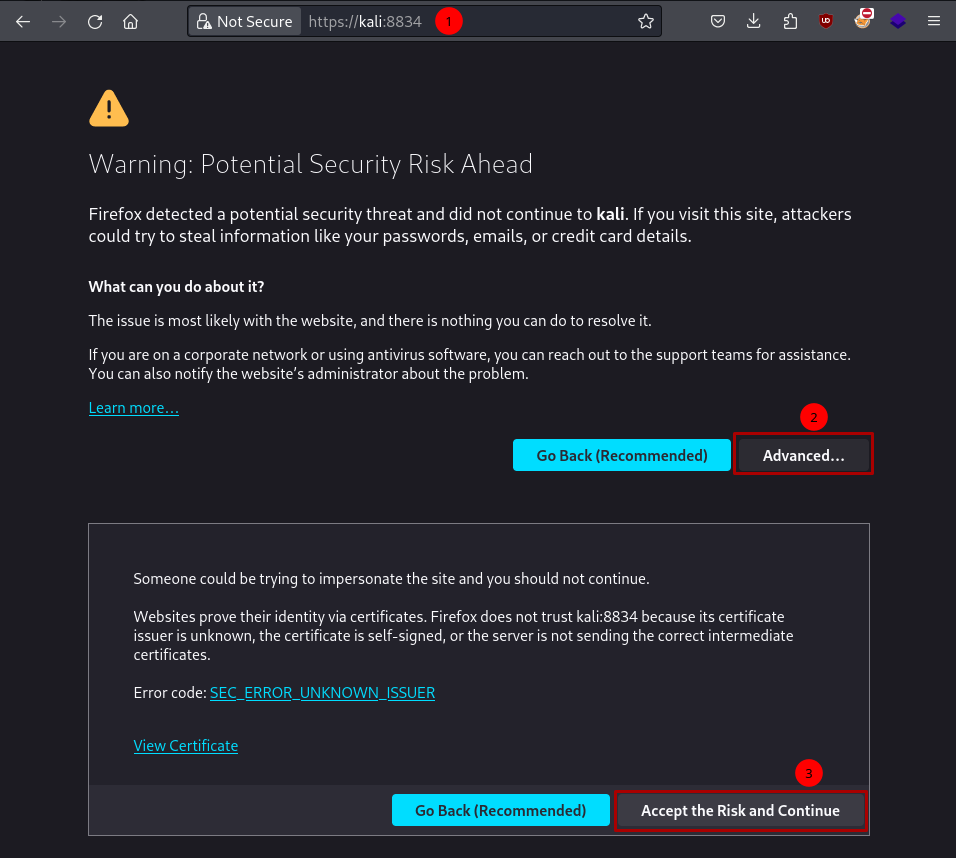
Nessus is a service which utilises all sort of scanning techniques and provides a central hub accessed through your browser which makes it easy to manage scans.
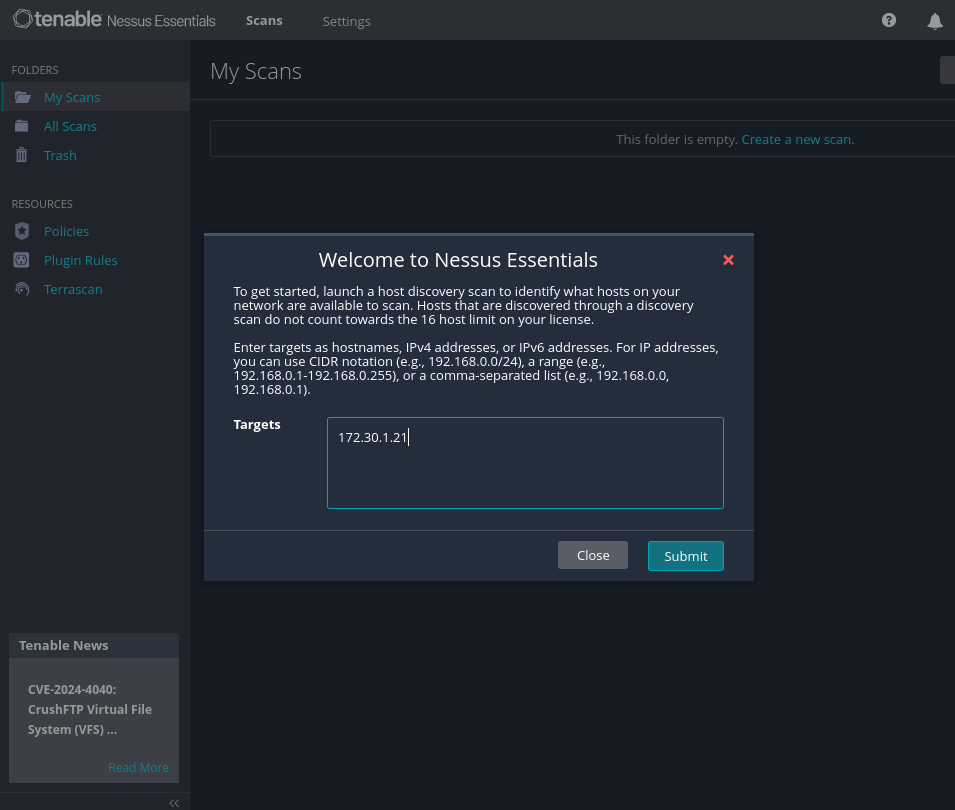
When the setup is completed you will be prompted with the option to provide the program with a list of targets to scan which I’ve entered the [Win2k8 IP address from chapter 1]:
This will start an automatic Basic scan which will reveal surface-level vulnerabilities which can be seen in the ‘My Scans’ section in the navigation menu.
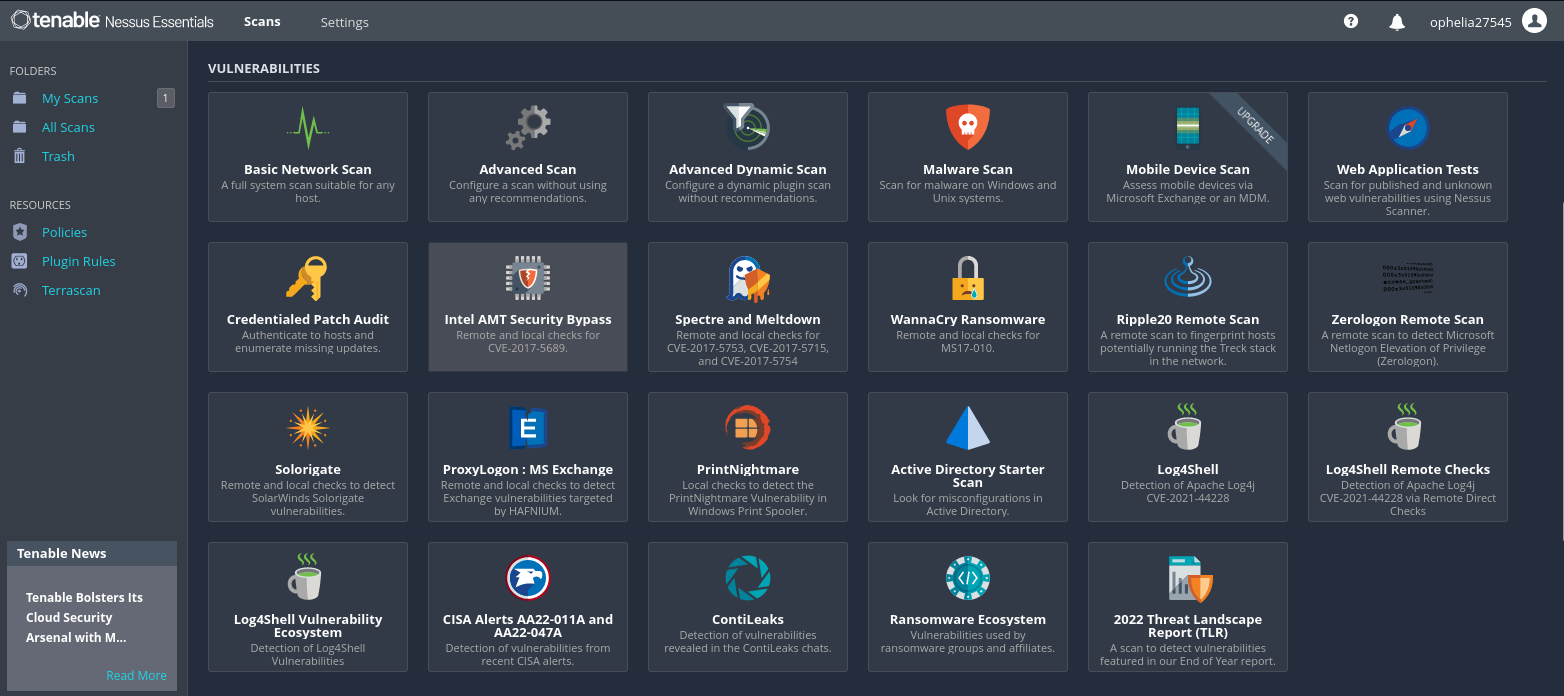
When navigating to ‘New scan’ Nessus will provide different types of scans to choose from ranging from full-fledged scans to specific vulnerability scans:
Main types of scans:
Host Discovery
Basic Network Scan
Advanced Scan
Malware Scan
The basic scan option is great to generate a quick report on surface-level vulnerabilities:
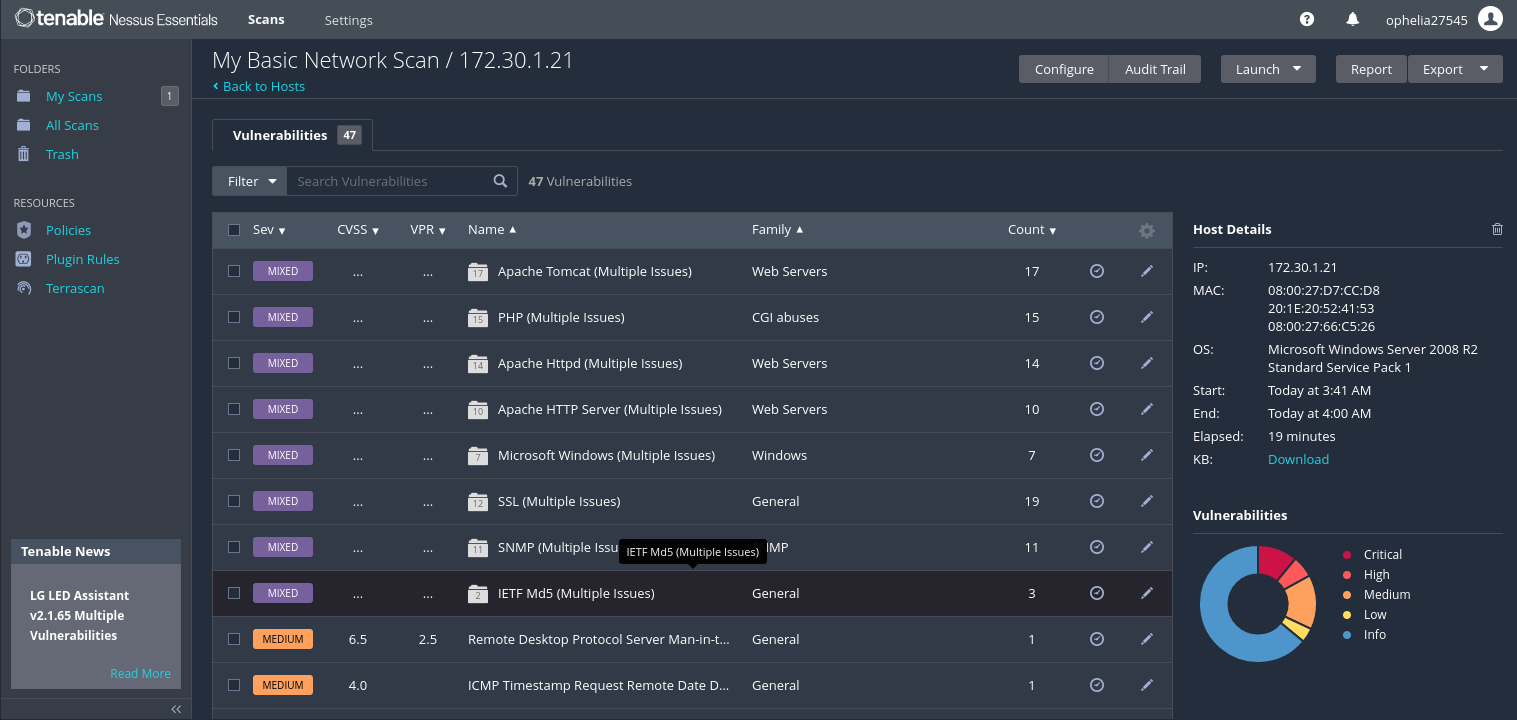
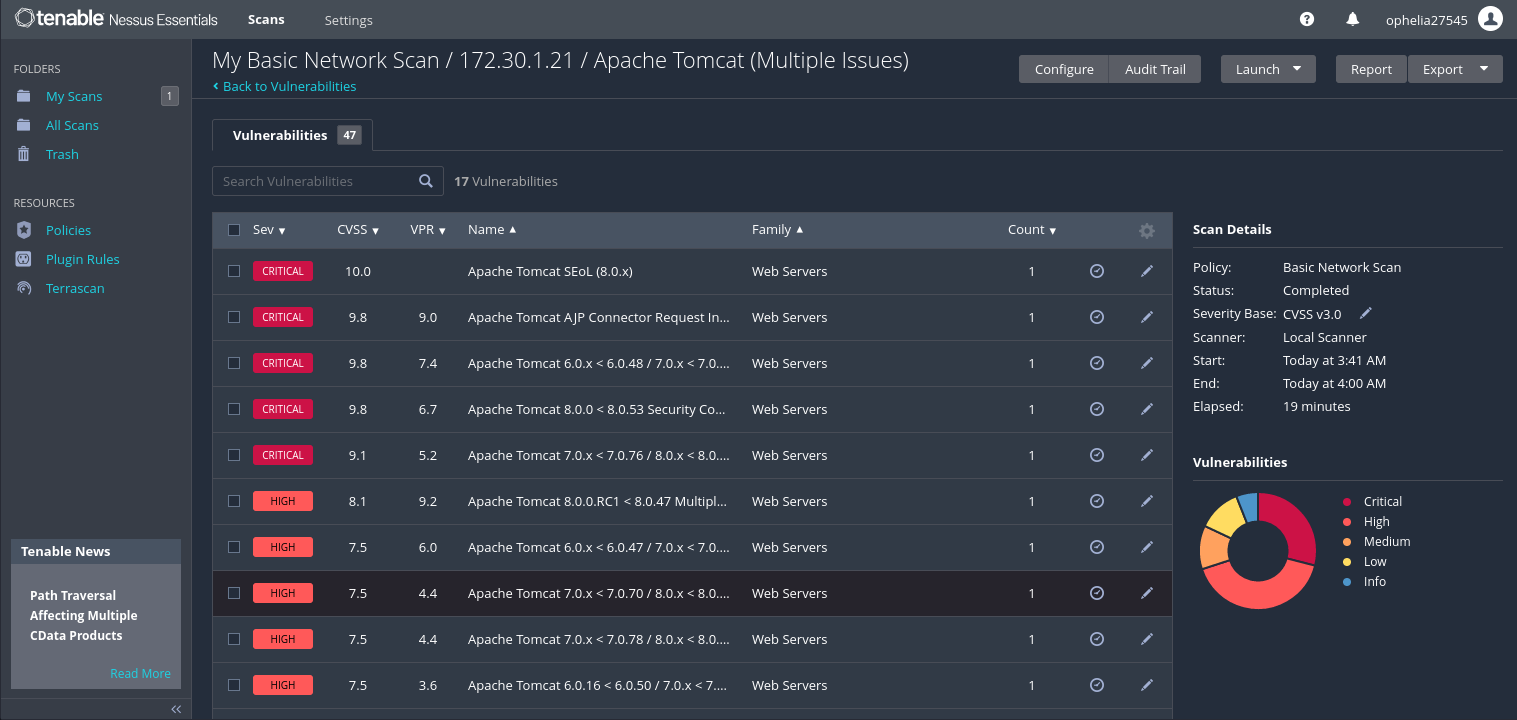
I can see the different results from the basic scan which are separated into different types folders which upon clicking will reveal findings of vulnerabilities, version types and information on technology used by the target:
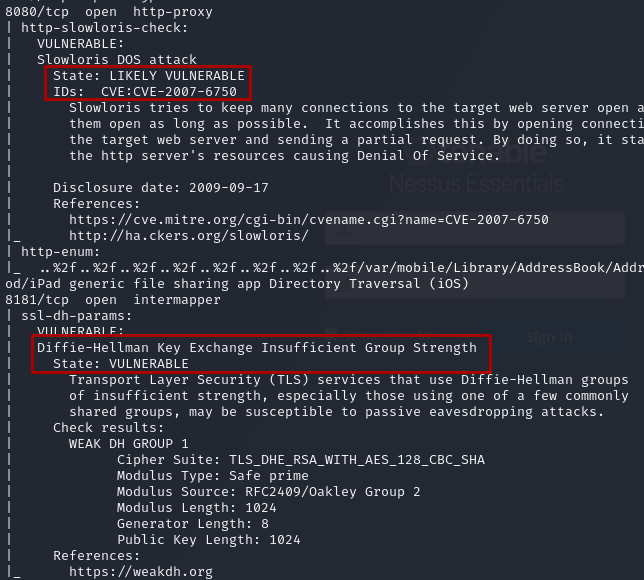
Here I am looking at the Apache Tomcat folder which will provide further information as to what can be exploited along with the CVE code:
Nmap scripting engine is a repository of scripts which are separated into different categories which can be used along with scans to enrich the reconnaissance phase.
The defined categories are as followed:
auth, broadcast, brute, default. discovery, dos, exploit, external, fuzzer, intrusive, malware, safe, version, and vuln
Greenbone Community Edition has come to its end-of-life in Jan 2023 and will be fully off Docker hub by June 2024 :(
See link for more details: GVM Community Edition 21.04 End of Life
This tool seems to be similar to nessus tool which provides lots of options for reconnaissance.
When performing the setup commands for GVM you will be provided with a admin password, make a note of this as this is important as it is needed for the sign in page in your browser:
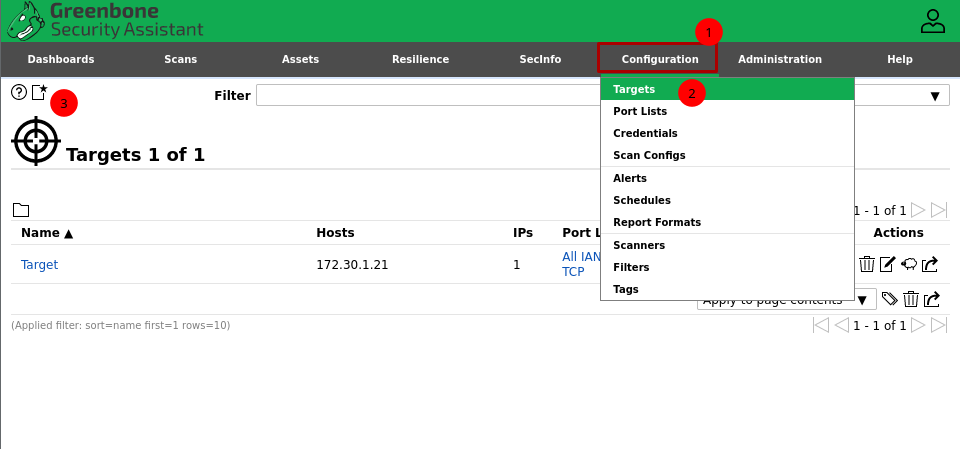
Upon login in you will see the main dashboard with charts, select Configuration > Targets > New Target:
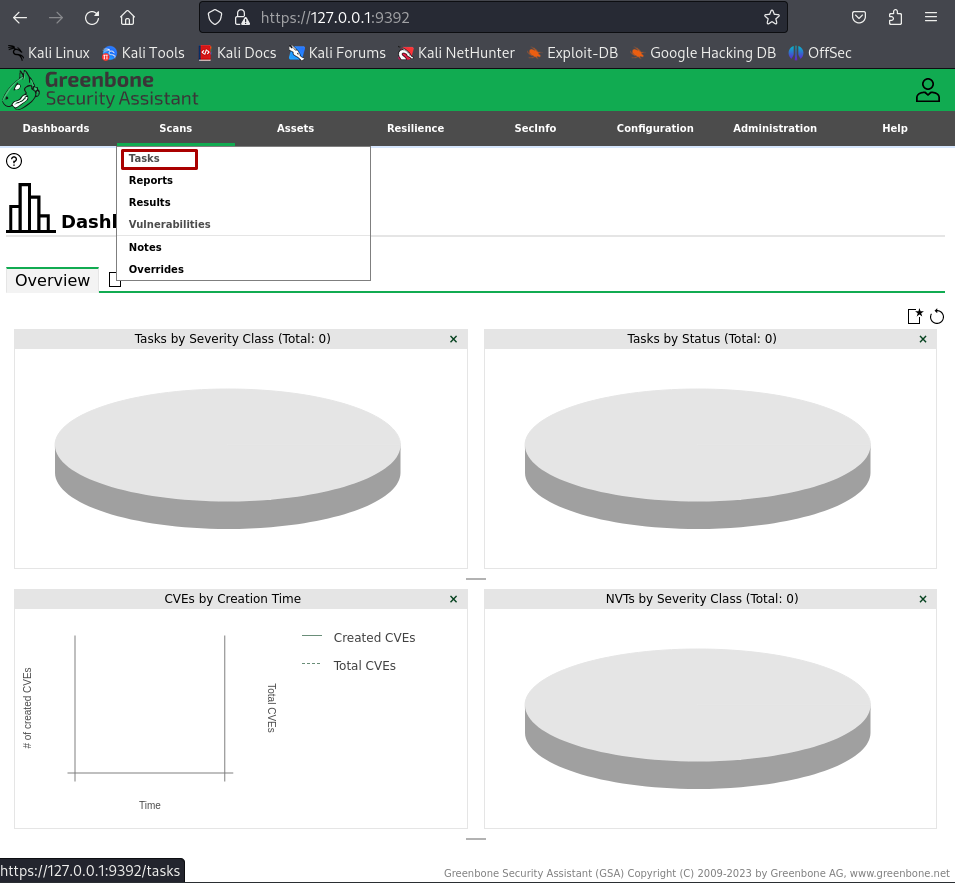
After setting a target create a task in Scans > Tasks to perform a basic automated scan on the target you’ve set earlier
Scanning a machine for all possible vulnerabilities on the surface level is good but what if your target is a website? Well here I will be covering just the surface of different web application scanners which may reveal information that can be of use as a pentester.
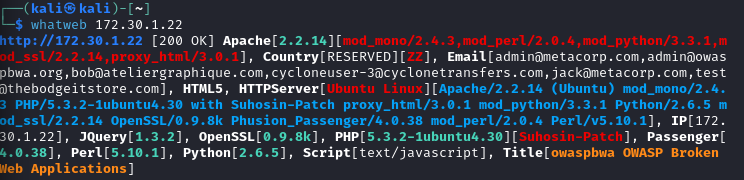
Whatweb is a recon tool used to retrieve different aspect of websites such as web servers, OS, content management system and other technologies by sending HTTP request and analysing the response.
Here is an example of it being used with whatweb <IP>:
Whoah, that’s a lot of information received from just a basic scan!
This tool provides custom depth searches and HTTP header customisation which I will be playing with more in the future so stay tuned.
If you remember from earlier we looked at Nmap’s scripting engine which provided a huge library of ready-to-use battle scripts for both recon and exploitation.
To look at the scripts available for web application you can use pattern search to list what’s out there with
$ ls /usr/share/nmap/scripts/http*
Here are some of the results for http result alone!
There are so many it’s excitingly overwhelming but don’t worry, well go through one example together. I’ve highlighted one of the sql injection script near the bottom as a way to demonstrate script functions.
# Use sql-injection detection on port 80$ nmap --script http-sql-injection -p 80 <IP>
# Use all scripts starting with "http-"$ nmap --script "http-*" -p 80 <IP>
4.3 Making Use Of Metasploit’s Wmap Scanning Tool
#
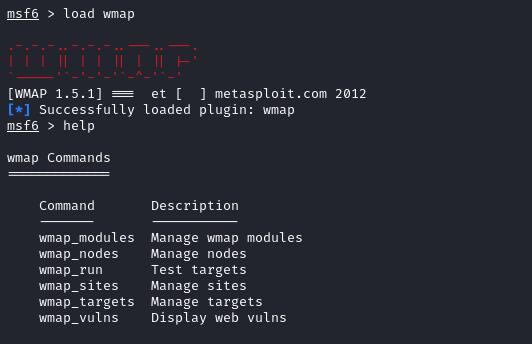
Metasploitable is truly the swiss army of reconnaissance and exploitation, another feature it provides are in-built plugins which provide unique functions compared to the scripts provided by MS.
We can load the module within MS with load wmap, if you’re curious as to what other plugins available use: load -l
Set a main site to tell wmap where it should be scanning, I will be using the Broken OWASP Web application virtual machine created in the labs section:
msf6 > wmap_sites -a 172.30.1.23
Specify a directory to perform enumeration on, here I will be using the the ‘mutilliadae’ challenge:
msf6 > wmap_targets -t 172.30.1.23/mutilliadae/
Then perform the attack!
msf6 > wmap_targets -l # List targets from sitesmsf6 > wmap_run -t # List all loaded modules for scans msf6 > wmap_run -e # Run all scans on target
This is an open-source reconnaissance tool for web vulnerabilities, it is helpful to get an overview of what technologies a website is using and potential known vulnerabilities it may have.
WordPress is a framework which allows users to use as an aid for building websites which is similar to Hugo which is what my blog is using.
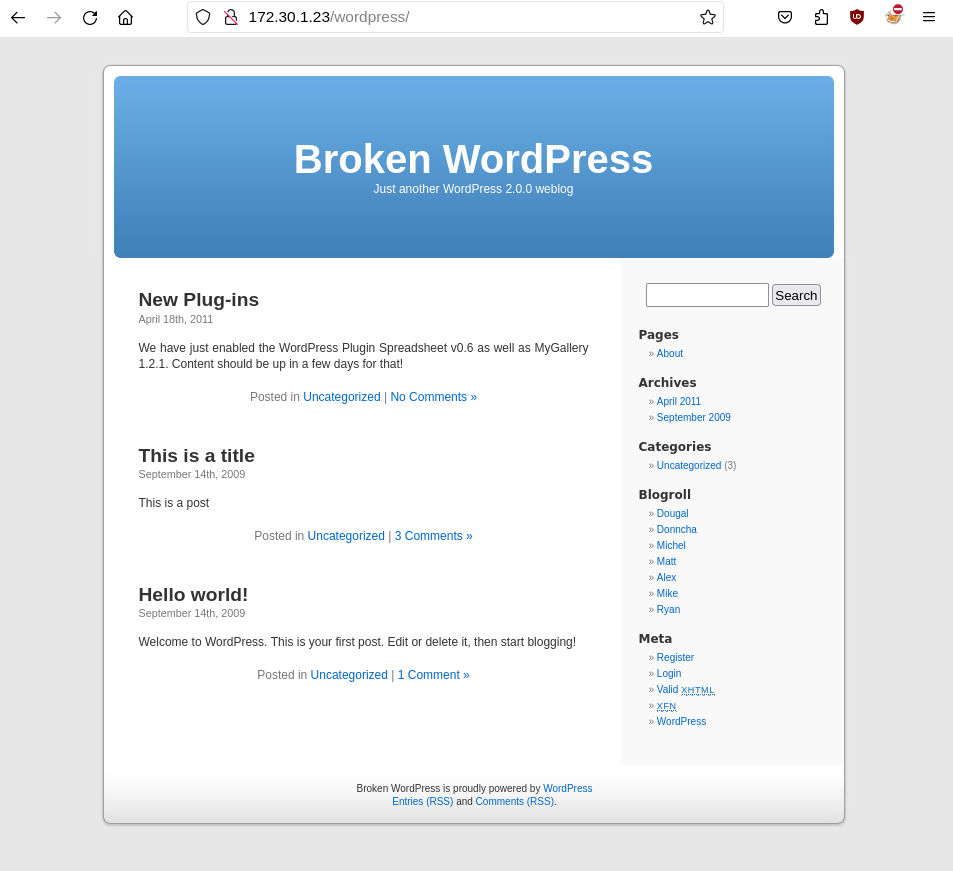
WPscan is a pre-install tool on Kali for specifically scanning WordPress websites. To test this I will be using OWASP BWA machine from Part-1:
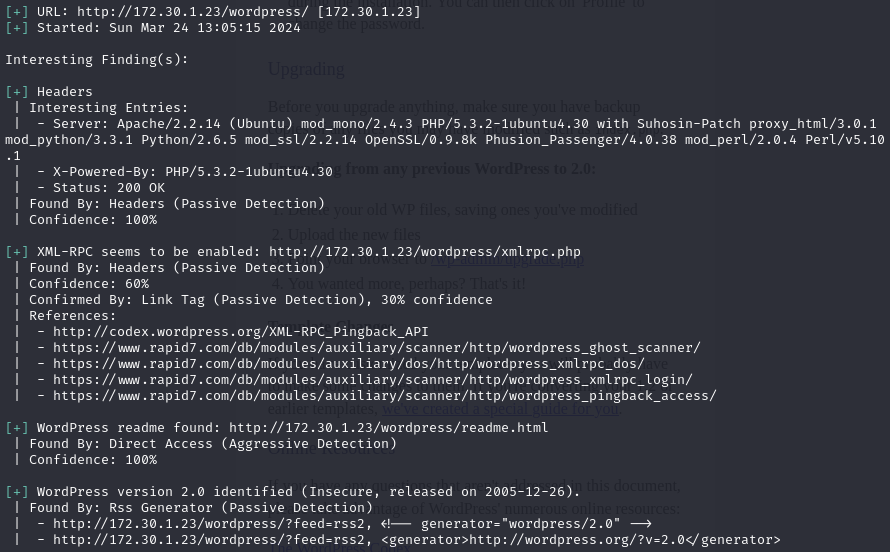
Target: 172.30.1.23/wordpress
# Display help menu$ wpscan --help
# Scan url with user enumeration $ wpscan --url 172.30.1.23/wordpress -e u
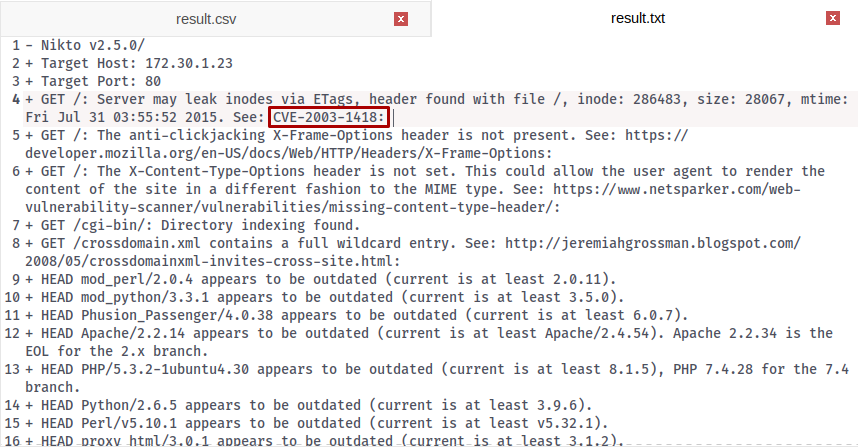
Results from scan:
Admin user name login found:
That concludes everything for this part of The Ultimate Kali Linux Book I am reading which is exciting to go through and learn all the different types of helpful tool that I could potentially use on my Pentesting / Hacking journey. Can’t wait to see you there for the next one, cheers.
Ultimate-Kali-Linux-Book -
This article is part of a series.